What is Cuticle Whitening
Cuticle whitening is a cosmetic process that aims to lighten the appearance of the cuticles, the thin layer of skin at the base of your nails. Cuticles can sometimes appear discolored, often yellowish, due to various factors such as staining from nail polish, exposure to certain chemicals, or underlying health issues. The goal of cuticle whitening is to restore a cleaner, more aesthetically pleasing look to the nails, improving the overall appearance of your hands. It’s a popular beauty treatment because it can make your nails look healthier and better cared for. However, it’s important to approach cuticle whitening with a good understanding of the methods and the potential risks involved, ensuring the health and well-being of your nails.
Understanding Cuticle Discoloration
Understanding why your cuticles are discolored is the first step in effective whitening. Cuticle discoloration isn’t just about aesthetics; it can also be a sign of underlying issues. Yellowing or staining can be caused by a variety of things, from the simple application of dark nail polish to more complex problems. Identifying the cause helps in choosing the right treatment and prevents future discoloration. It can also help you recognize if you need to see a healthcare professional. Sometimes, discoloration can signal a fungal infection or other nail conditions that need medical attention. The more you know about the causes, the better equipped you are to maintain healthy and attractive nails.
Causes of Yellowed Cuticles

Several factors can contribute to yellowed cuticles, and understanding these causes can help you prevent discoloration and choose the right whitening methods. One of the most common causes is the use of dark nail polish, particularly if a base coat is not applied. The pigments in the polish can seep into the nail and the surrounding skin, causing a yellow tint. Smoking is another major culprit, as nicotine can stain both the nails and cuticles. Fungal infections, such as onychomycosis, can also lead to yellowing, as the fungus can cause the nail to thicken and discolor. Additionally, exposure to harsh chemicals, such as those found in cleaning products or certain nail treatments, can damage the nails and cause discoloration. In rare cases, certain medical conditions or nutritional deficiencies may also contribute to cuticle yellowing.
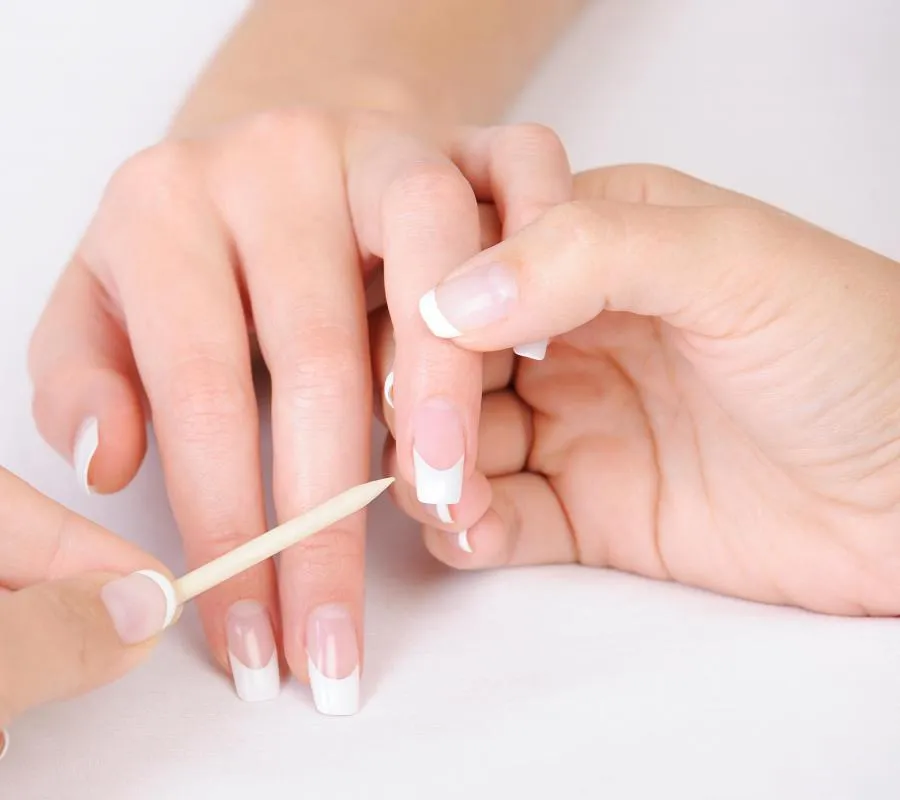
Preparing for Cuticle Whitening
Before you begin any cuticle whitening treatment, proper preparation is key to achieving the best results. The preparation stage includes gathering the necessary supplies and performing a gentle cleaning and exfoliation of your cuticles. This process helps remove dead skin cells, surface stains, and ensures that the whitening agents can effectively penetrate the cuticles. Proper preparation maximizes the efficacy of your chosen whitening method and reduces the risk of irritation or damage. Taking the time to prepare your nails properly will significantly improve the outcome of your cuticle whitening efforts, giving you healthier and more attractive hands. Proper preparation also helps to ensure the safety of the procedures.
Gathering Your Supplies
The first step in preparing for cuticle whitening is gathering the right supplies. Depending on the method you choose, your supply list may vary, but there are a few essentials you will always need. These include cotton balls or pads for applying solutions, a soft nail brush or cuticle pusher for gentle cleaning, and a small bowl for mixing or soaking. If you plan to use lemon juice, you will need a fresh lemon; for baking soda, you will need baking soda and water; and for hydrogen peroxide, you will need a diluted solution (usually 3% concentration) and a bit of caution. Always have a gentle hand lotion or cuticle oil on hand to moisturize after treatment. It’s also useful to have a nail file to gently buff the surface of your nails and cuticles. Make sure all your tools are clean and safe to use to avoid any risk of infection.
Gentle Cleaning and Exfoliation

After gathering your supplies, the next step is gentle cleaning and exfoliation of your cuticles. Start by washing your hands thoroughly with soap and water to remove any dirt or oil. Soak your nails in warm water for a few minutes to soften the cuticles. This makes the exfoliation process easier and less damaging. Use a soft nail brush or cuticle pusher to gently clean around the cuticles, removing any debris and lifting dead skin cells. Avoid harsh scrubbing or aggressive pushing, as this can damage the delicate skin. If you choose to exfoliate, use a gentle scrub made specifically for cuticles or a mixture of baking soda and water. Rinse your hands and pat them dry before proceeding with the whitening treatment. This step ensures that the whitening agents can effectively penetrate the cuticles and deliver better results.
Whitening Methods Explained
There are several methods you can use to whiten your cuticles, each with its own set of benefits and potential drawbacks. Popular options include using lemon juice, a baking soda paste, or hydrogen peroxide, and sometimes even essential oils. Each method works differently, and the effectiveness can vary depending on the degree of discoloration and your skin type. It is important to understand the steps involved, potential risks, and expected outcomes of each method before you begin. Some methods may be more suitable for certain skin types or levels of discoloration. Always perform a patch test to ensure you do not have an allergic reaction. The correct whitening method will make your hands look much more clean and well-cared for.
Lemon Juice Method
Lemon juice is a popular home remedy for cuticle whitening due to its natural bleaching properties. The citric acid in lemon juice helps to lighten discoloration. To use this method, cut a fresh lemon in half and squeeze the juice into a small bowl. Dip a cotton ball or pad into the lemon juice and apply it directly to your cuticles, ensuring all areas are covered. Let the lemon juice sit on your cuticles for 5-10 minutes. Rinse your hands with water and moisturize. Be careful to avoid getting lemon juice on any open cuts or broken skin, as it can cause stinging. The lemon juice method is simple, readily available, and can provide noticeable results with regular use. However, it is important to limit the exposure time to prevent excessive dryness or irritation. Always moisturize your hands after the process is over.
Baking Soda Paste Method

Baking soda is another effective solution for cuticle whitening, thanks to its gentle abrasive properties. It can help remove surface stains and brighten the skin. To use this method, mix baking soda with a small amount of water to form a paste. Apply the paste to your cuticles and gently scrub for 1-2 minutes using a soft nail brush or your fingertips. Rinse your hands thoroughly with water and pat them dry. Apply a moisturizer or cuticle oil to rehydrate the skin. Baking soda is a mild abrasive, so avoid scrubbing too hard to prevent irritation. This method is generally safe and can be used several times a week. Baking soda helps to exfoliate and brighten the cuticles, leaving your nails looking cleaner and your hands feeling refreshed. This is one of the most affordable options to get the desired results.
Hydrogen Peroxide Method
Hydrogen peroxide, a common antiseptic, can also be used for cuticle whitening due to its bleaching properties. However, it is important to use it with caution. Dilute a 3% hydrogen peroxide solution with an equal amount of water. Dip a cotton ball or pad into the diluted solution and apply it to your cuticles, allowing it to sit for 2-3 minutes. Rinse your hands thoroughly with water. Moisturize immediately after to prevent dryness. Hydrogen peroxide can be harsh, so it is crucial to avoid prolonged exposure and use the diluted solution. Always perform a patch test first to check for any adverse reactions. Avoid contact with your eyes and be careful if you have any cuts or broken skin. If you have any concerns about using hydrogen peroxide, consult with a healthcare professional or dermatologist before proceeding. Be certain to follow all the safety guidelines before using this method.
Essential Oils for Whitening
Certain essential oils, such as tea tree oil and lemon oil, are believed to have properties that can help lighten cuticles. While the evidence is not as strong as for other methods, some people find these oils beneficial. To use essential oils, mix a few drops of the chosen oil with a carrier oil, such as jojoba or almond oil. Apply the mixture to your cuticles and let it sit for 15-20 minutes. Rinse your hands and moisturize. Always perform a patch test before applying any essential oil to ensure you don’t have an allergic reaction. Essential oils should be diluted before use, as they can be potent and cause irritation if used undiluted. The use of essential oils for cuticle whitening is often a more gentle approach. Remember that essential oils may take longer to produce visible results compared to other methods.
Application Techniques
Proper application techniques are crucial for achieving the best results and minimizing any potential risks. Whether you are using lemon juice, baking soda, hydrogen peroxide, or essential oils, it is important to apply the product directly to the cuticles. Using a cotton ball, pad, or a small brush will ensure even coverage. Avoid getting the solution on the surrounding skin or under the nails unless necessary. Follow the recommended application time for each method, as overexposure can lead to irritation or dryness. Always rinse your hands thoroughly after applying the solution and pat them dry. Moisturizing after application is a must, as whitening treatments can be drying. If you notice any irritation, such as redness, itching, or burning, discontinue use immediately and rinse your hands. Proper application will improve your outcome and give your hands a more professional look.
Maintaining Whitened Cuticles
Maintaining whitened cuticles involves adopting a consistent nail care routine and avoiding habits that can lead to discoloration. Regular moisturizing, careful nail care, and avoiding harsh chemicals are key to long-lasting results. By implementing these practices, you can keep your cuticles looking clean and healthy. It is important to be consistent and patient because maintenance is just as important as the initial whitening process. With proper care and maintenance, you can enjoy beautifully maintained nails that look fresh and well-cared for. These practices will not only preserve your results but also promote overall nail health.
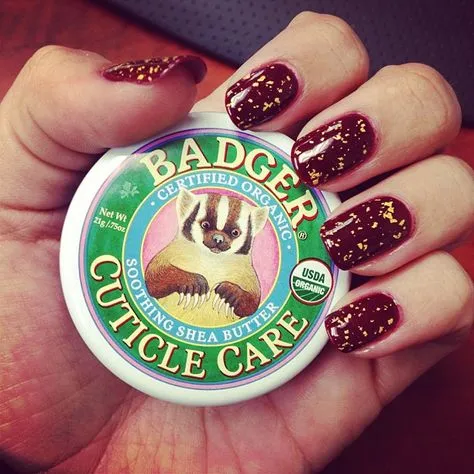
Regular Moisturizing
Moisturizing is essential for maintaining healthy cuticles and preventing discoloration. Dry cuticles are more prone to damage and staining. Apply a rich hand cream or cuticle oil several times a day, especially after washing your hands and after any whitening treatments. Look for products that contain ingredients like shea butter, vitamin E, or jojoba oil, which deeply hydrate and nourish the skin. Massaging the moisturizer into your cuticles will also improve blood circulation and promote healthy nail growth. Consistent moisturizing keeps your cuticles supple, reduces the risk of dryness and cracking, and enhances the appearance of your hands. Make moisturizing a part of your daily routine for best results.
Nail Care Routine

Establishing a consistent nail care routine is vital for maintaining cuticle health and preventing discoloration. This includes regular trimming and shaping of your nails, gentle cuticle care, and protecting your nails from damage. Avoid biting or picking at your nails, as this can damage the cuticles and lead to infections. When applying nail polish, always use a base coat to protect your nails from staining. Allow your nails to breathe occasionally by taking breaks from nail polish. Use a cuticle pusher to gently push back your cuticles after a shower or bath, but avoid aggressive pushing that can damage the nail matrix. A well-rounded nail care routine keeps your nails strong, healthy, and attractive. Proper nail care routines reduce the need for whitening treatments. Incorporate these practices into your lifestyle for long-term benefits.
Avoiding Harsh Chemicals
Avoiding harsh chemicals is crucial for preventing cuticle discoloration and maintaining healthy nails. Wear gloves when doing household chores, especially when using cleaning products, as these can contain chemicals that can damage your skin and nails. Be mindful of the ingredients in your nail polish remover, opting for acetone-free formulas that are less harsh. If you frequently use nail polish, consider using a base coat to protect your nails from staining. Limit your exposure to chemicals found in nail salons, such as those used in acrylic nails or gel manicures, as these can be damaging. By being proactive and avoiding harsh chemicals, you can significantly reduce the risk of cuticle discoloration and maintain healthy, beautiful nails. Always check the ingredient list before using products.
When to Seek Professional Help
While many cuticle whitening methods can be done at home, there are times when it’s essential to seek professional help. If your cuticles are severely discolored, show signs of infection, or if home treatments are not providing results, it’s best to consult a dermatologist or a nail care professional. A professional can diagnose the underlying cause of the discoloration and recommend more effective treatments. They can also identify any infections or skin conditions that may be contributing to the problem. Additionally, if you experience persistent pain, swelling, or pus around your cuticles, seek medical attention immediately. A professional will have the skills to provide the appropriate care. In cases of fungal infections or other skin conditions, professional intervention is often necessary for a complete and safe recovery. Do not delay if you are experiencing problems.